GIMP 2.6 Interface Tutorial
Preamble
For clarity with the other GIMP tutorials on this site, I have split the main GIMP toolbox and the other dialogues (Layers, Gradient etc).
For everyday use it is far easier to have these dialogues as part of the GIMP when you start up. This can be done in a tab format, which will be familiar to anyone using Firefox or any other up to date browser.
Setting up dockable dialogues
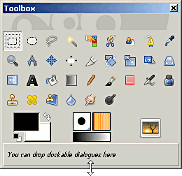
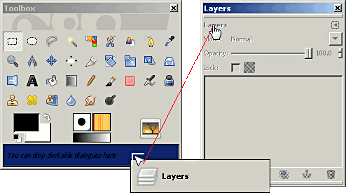
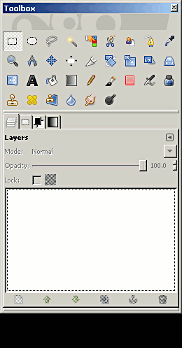
Open up the GIMP and at the bottom of the GIMP toolbox use your mouse to extend the box down until the You can drop dockable dialogs here section appears.
Adding the Layers dialogue
The Layers Dialogue can be opened from the GIMP image window menu as follows
Windows » Dockable Dialogs » Layers
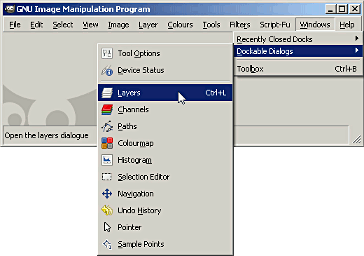
On the Layers Dialogue position the mouse over the Layers text and hold the left mouse key down. Now drag the Layers Dialogue over to the Dockable dialogue section of the GIMP toolbox (the part labelled You can drop dockable dialogs here) and release the mouse button.
Adding extra dialogues
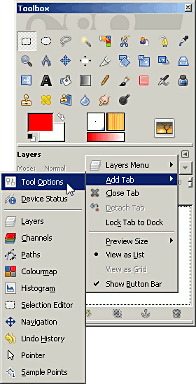
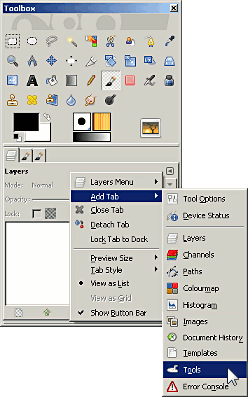
Now the initial dialogue has been attached, adding extra dialogues is very easy. In the top right hand corner of the newly attached dialogue there is an arrow. Click on this arrow, which reveals the Configure tab menu. Move to highlight the Add tab selection, then add whatever tab you want from the menu.
Streamlining the interface
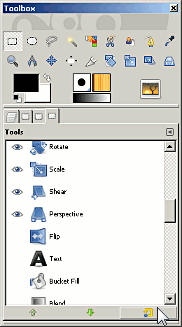
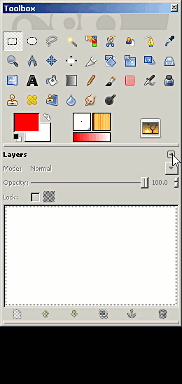
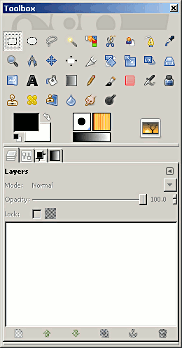
In the finished example below left I have added the Layers, Tools, FG/BG Colour & Gradient dialogues.
You can obviously add whatever you want, but as a bare minimum I would have the Layers & Tools dialogues, they are certainly the most used in my experience. As you begin to use GIMP more, you will find out which dialogues you use the most and want to access frequently.
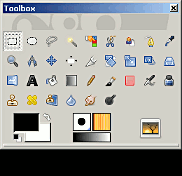
As I have added the FG/BG Colour & Gradient dialogues to the tab interface, I can get rid of those two Toolboxes (as well as the image preview toolbox) from the GIMP toolbox as seen from the example below right. To remove the Toolboxes go to
Edit » Preferences
In the Preferences you will find the Toolbox option, where you can uncheck the ones you don't want.
Configuring the Tool menus on the Toolbox
Click on the Configure tab menu in the dialogue box as mentioned above. Go to Add tab and select the Tools dialogue near the bottom of the menu. Now you can select which menus you want on the main GIMP toolbox.
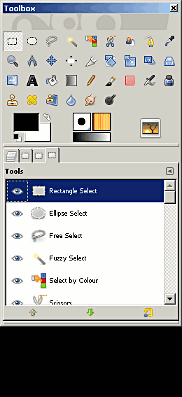
The screenshot below shows a GIMP toolbox with about half the toolbox menus removed. It makes the GIMP interface far less cluttered, when you only have the menus you use the most on the toolbox.
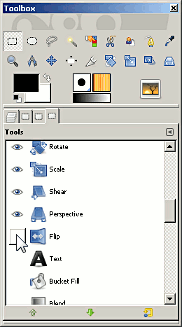
All these menus can be accessed on the active window file menus and if you find yourself using one menu a lot, stick it back onto the GIMP toolbox. The whole menu can be reset to its defaults, by the Reset button on the bottom right.
Reset can also be found at Edit, Preferences, Tool Options.
