Using Unsharp Mask on resized images
Preamble
This is not so much a tutorial as a tip for any reduction in scaling of images. This was done with GIMP, but the same mask is used in Photoshop and Paintshop Pro.
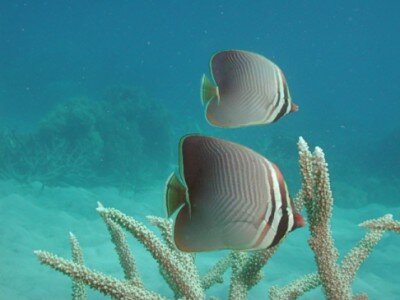
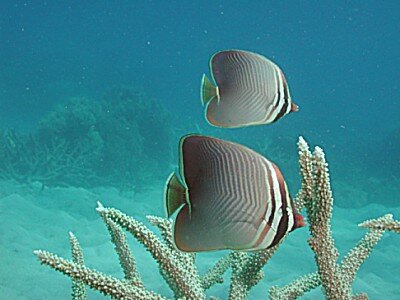
Look closely at the two images below. Look at the coral and the chevrons on the fish, you should notice that the one below is a lot sharper compared to the one above.
The one above is also a little darker and the background looks hazy compared to the masked image below it.


Resizing the image
The original high resolution image was 2048×1536 pixels, this is nearly five times bigger than the image we use on the site. When this is scaled down it is not scaled straight down to 400×300, as the interpolation (averaging by the image manipulation software) will introduce too much blurring. This is demonstrated by the top image which is scaled down in one hit and has no sharpening filter applied.
Scale the image down in 50% steps (in this case width 2048 to 1024 and then 400). When this was scaled down we used the cubic option, this is the slowest, but best quality option. The default option is linear, which is ok too, we just wanted to retain as much of the original quality as possible for the site.
Unsharp Mask (the misleading filter)
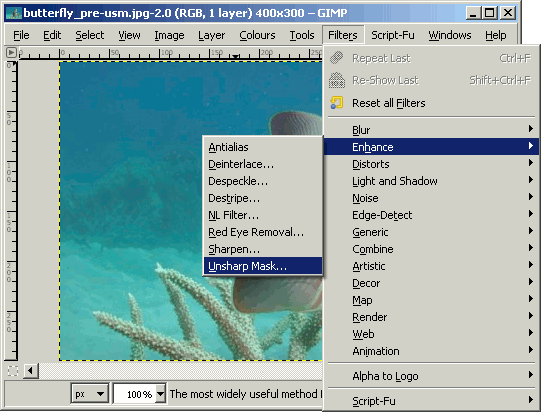
There is a filter called Unsharp Mask, which can be found on the GIMP image toolbar at
Filters » Enhance » Unsharp Mask

It's a very misleading name for a sharpening filter, if you Google it you can find out the history of why it's called that. Consequently it is usually ignored by anyone not familiar with image manipulation programs.
I mean who the hell would want to unsharpen an image?! Anyway it does just the opposite and is in fact the best out of the box way of improving your image quality. This, as newbies, we only found out after all our images were uploaded ... ho hum.
Setting Parameters
Having followed the directions above, you will be presented with the unsharp mask dialogue box. This has a preview option, so that you can see how your adjustments effect the image and the following settings:
Radius : Range 0.1 to 120
Amount : Range 0.00 to 5.00
Threshold : Range 0 to 255
Radius Sets how many pixels from the edge will be affected by sharpening.
Amount Sets the strength of sharpening.
Threshold Sets the minimum difference in pixel values, where sharpen is applied to an edge.
Adjustments
For our images we've set Radius 1.0, Amount 0.30 and Threshold 0. That was good for the image above, but just experiment with it until you find what suits your images. Go to Authentic Boredom, which is where we learnt about the much ignored unsharp mask. It has good advice and links on the process.
Script-Fu's again
We've modified a 25% scaling and unsharp mask script-fu for the gallery images on the site. All our images are high resolution and this reduces it by 50%, performs an unsharp mask , reduces to gallery size (524×393) and unsharp masks again.
The original script-fu (Scale 25%) written by Dr Martin Rogge, can be found at the GIMP registry. Have a look at the scale524.scm scaling script-fu on our Script-Fu downloads page, which has helpful comments for each action (comments are preceded with a semi-colon) and feel free to tweak for your own image size.
See the Script-Fu help page if you need instructions on loading and activating it.
