Grayscale layer mask tutorial · 1
The grayscale mask method works very well on images, to correct the exposure of dark areas, without overexposing bright areas. Compare the before & after photos.
Add a grayscale layer mask
On the main GIMP toolbar, open the layers dialogue found under
Windows » Dockable Dialogs » Layers
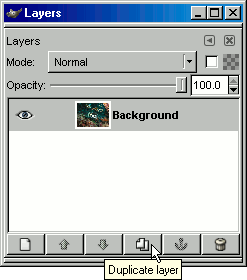
In the layers dialogue click Duplicate to create a copy of your image and make sure it is selected.
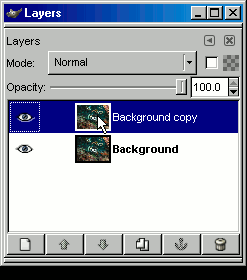
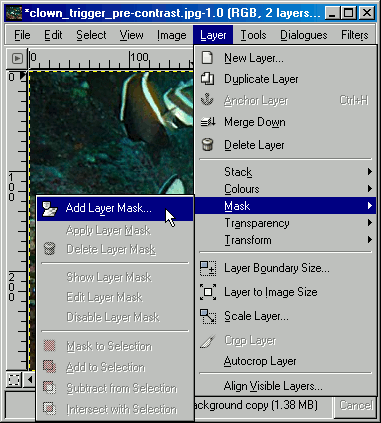
With this layer selected add a layer mask found on the image toolbar
Layer » Mask » Add Layer Mask
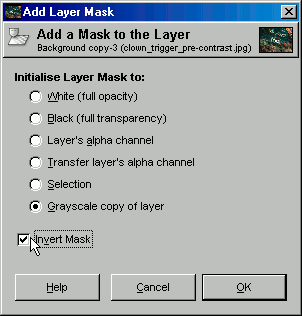
This presents you with some mask options, choose
Grayscale copy of layer and check the Invert Mask option.
In the layers dialogue change the Mode of the duplicated layer to Screen.
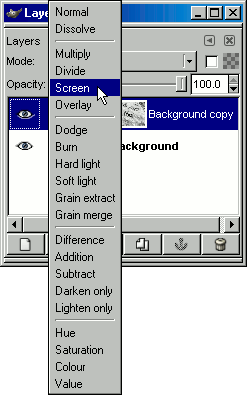
At this stage you can play with the Opacity of the screen layer if you feel the image is too washed out. Alternatively you could duplicate this layer to brighten it even more.
