GIMP bump map tutorial
Bump mapping the photo
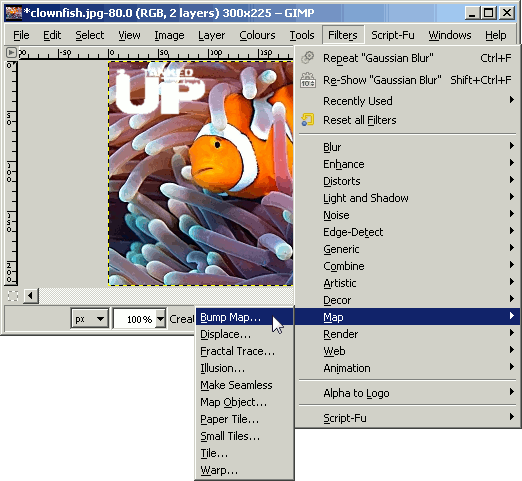
In the photo image apply the bump map
Filters » Map » Bump Map

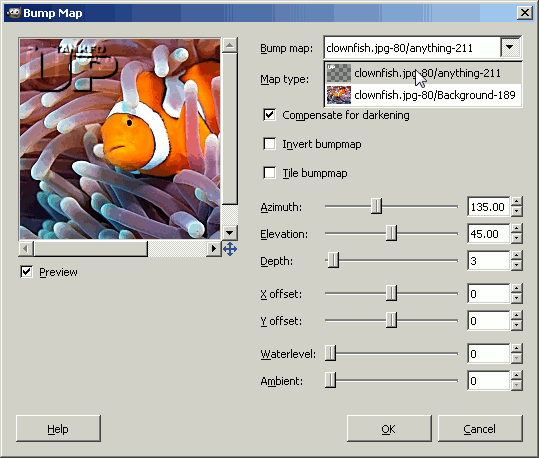
When you are presented with the Bump Map dialogue, select the logo layer in the Bump Map option box.
Make sure Compensation for darkening is ticked, it is by default, but check anyway.
The white logo will bump or raise the photo image, if you want a hollowed impression select the Invert bumpmap option.

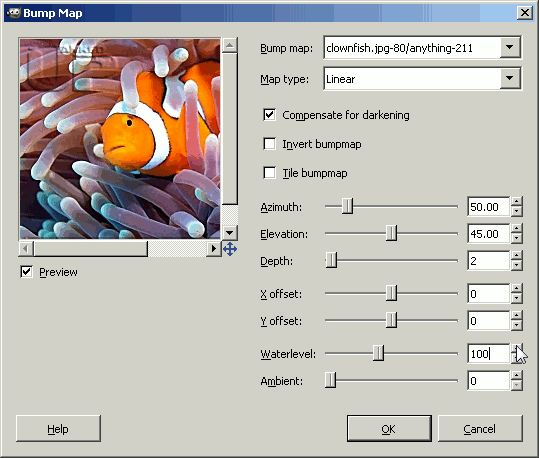
The adjustments we have made for our images are as follows :
Azimuth : 50.00
Depth : 2
Waterlevel : 100
All the other options have been left at their default values.

If you tick the preview option you can see how each option changes the bump map. When you are happy with the result click ok.
Download GIMP 
